Fold a clean dry shirt repeatedly to one footprint without marking or measuring the garment each time.
Original bounded component build. Dimensions describe this example, not an approved structural, occupied-building or universal fit design. Unbuilt / untested. US customary dimensions control.
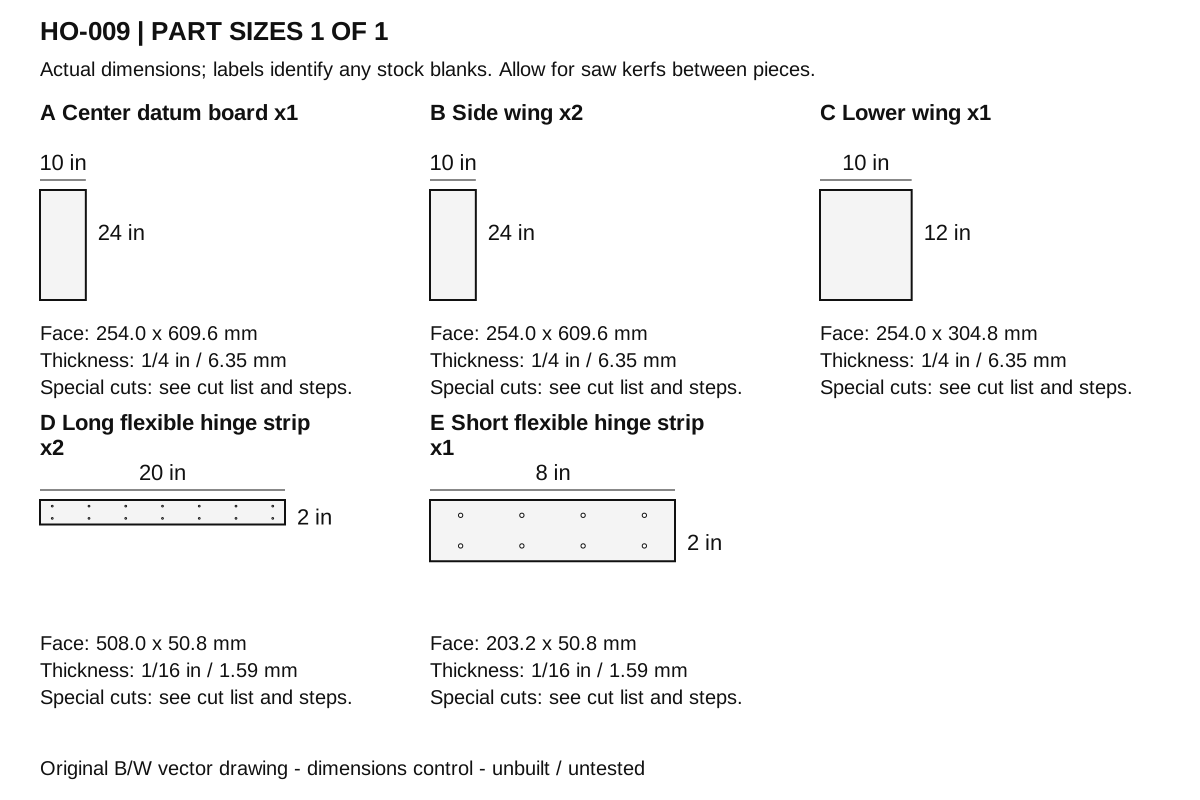
| Part | Quantity | Actual dimensions | Material / special cut |
|---|---|---|---|
| A Center datum board | 1 | 10 in x 24 in x 1/4 in 254.0 x 609.6 x 6.35 mm | Sound untreated hardwood or exterior-bond plywood, actual measured thickness; reject split/warped stock Square ends; remove all splinters and burrs. |
| B Side wing | 2 | 10 in x 24 in x 1/4 in 254.0 x 609.6 x 6.35 mm | Sound untreated hardwood or exterior-bond plywood, actual measured thickness; reject split/warped stock Square ends; remove all splinters and burrs. |
| C Lower wing | 1 | 10 in x 12 in x 1/4 in 254.0 x 304.8 x 6.35 mm | Sound untreated hardwood or exterior-bond plywood, actual measured thickness; reject split/warped stock Square ends; remove all splinters and burrs. |
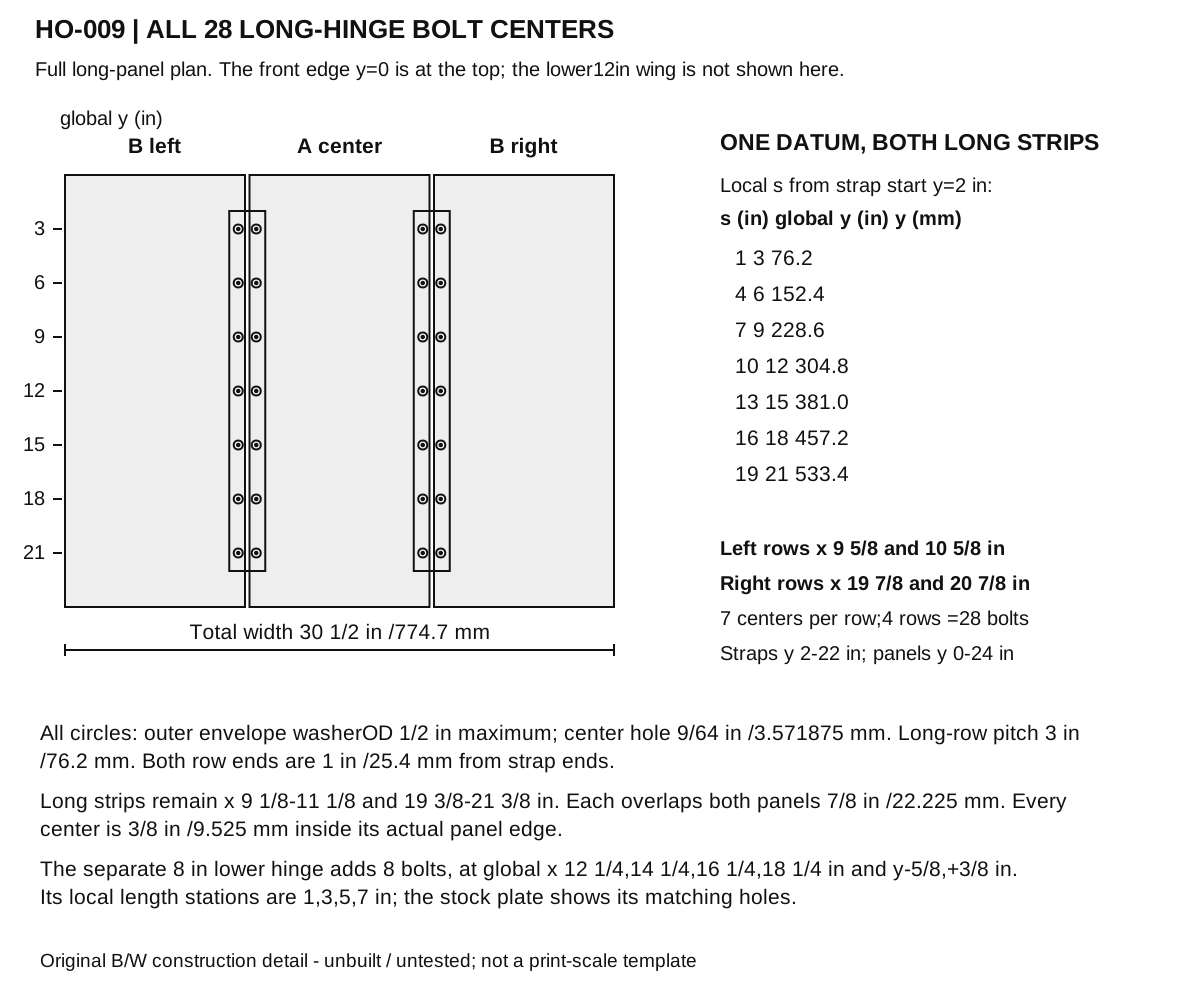
| D Long flexible hinge strip | 2 | 20 in x 2 in x 1/16 in 508.0 x 50.8 x 1.5875 mm | Durable woven polyester webbing; thickness is schematic Cut cleanly and seal fabric edges by the supplier method without heating an assembled panel. Both edges use local length stations 1, 4, 7, 10, 13, 16, 19 in; transverse centers 1/2 and 1 1/2 in. Hole 9/64 in; see global assembly pattern. |
| E Short flexible hinge strip | 1 | 8 in x 2 in x 1/16 in 203.2 x 50.8 x 1.5875 mm | Same woven polyester webbing Finished 8 x 2 in strip; not a third 20 in installed strip. Two transverse rows 1/2 and 1 1/2 in; local length stations 1, 3, 5, 7 in; hole 9/64 in. |
Tape, square, pencil; clamped saw setup appropriate to the material; drill/driver and depth stop; countersink for wood fasteners; files/sanding block; clamps. Specific additional tools are noted in the steps.
x=left/right, y=front/rear, z=up; origin is front-left underside unless stated
Retained segments with the same part/instance belong to one machined stock piece, not additional parts. Positions and sizes below are US inches; rotations are degrees.
| Part / instance | Origin x,y,z | Size / rotation |
|---|---|---|
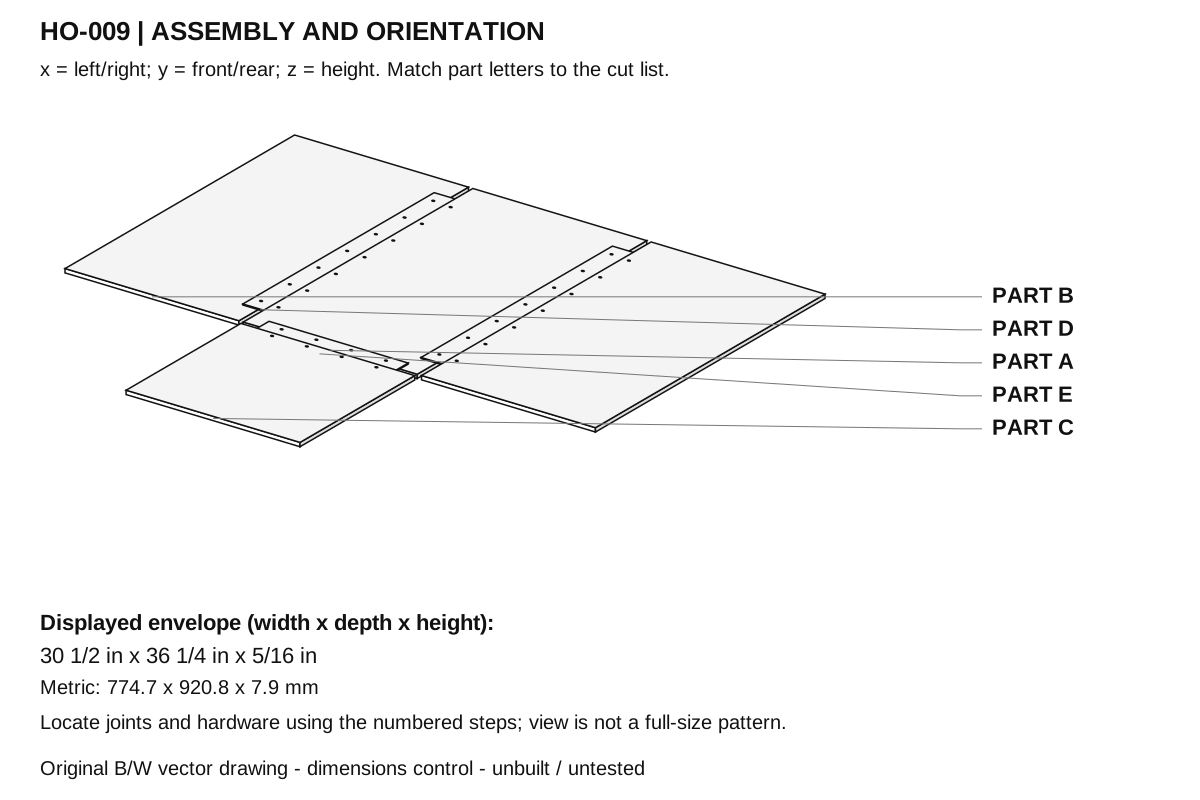
| A / 1 | [10.25, 0, 0] | [10, 24, 0.25] / [0, 0, 0] |
| B / 1 | [0, 0, 0] | [10, 24, 0.25] / [0, 0, 0] |
| B / 2 | [20.5, 0, 0] | [10, 24, 0.25] / [0, 0, 0] |
| C / 1 | [10.25, -12.25, 0] | [10, 12, 0.25] / [0, 0, 0] |
| D / 1 | [9.125, 2, 0.25] | [2, 20, 0.0625] / [0, 0, 0] |
| D / 2 | [19.375, 2, 0.25] | [2, 20, 0.0625] / [0, 0, 0] |
| E / 1 | [11.25, -1.125, 0.25] | [8, 2, 0.0625] / [0, 0, 0] |
Dry garment folding only; no ironing or hot cookware.
Thin material and fabric hinges are not child-play hinges or load-carrying hardware.
Remove bolt caps as needed for separate fabric/board cleaning; keep matching hardware together and dry the webbing fully before folding closed.
Inspect stitches/bolt holes for tearing and hinge strips for creep; re-measure the equal 7/8 in overlaps after repair. Replace frayed straps rather than tightening bolts through torn weave.
Long row axes in metric: x 244.475, 269.875, 504.825, 530.225 mm; common y 76.2, 152.4, 228.6, 304.8, 381.0, 457.2, 533.4 mm. Local s stations are identical for both 20 in strips.
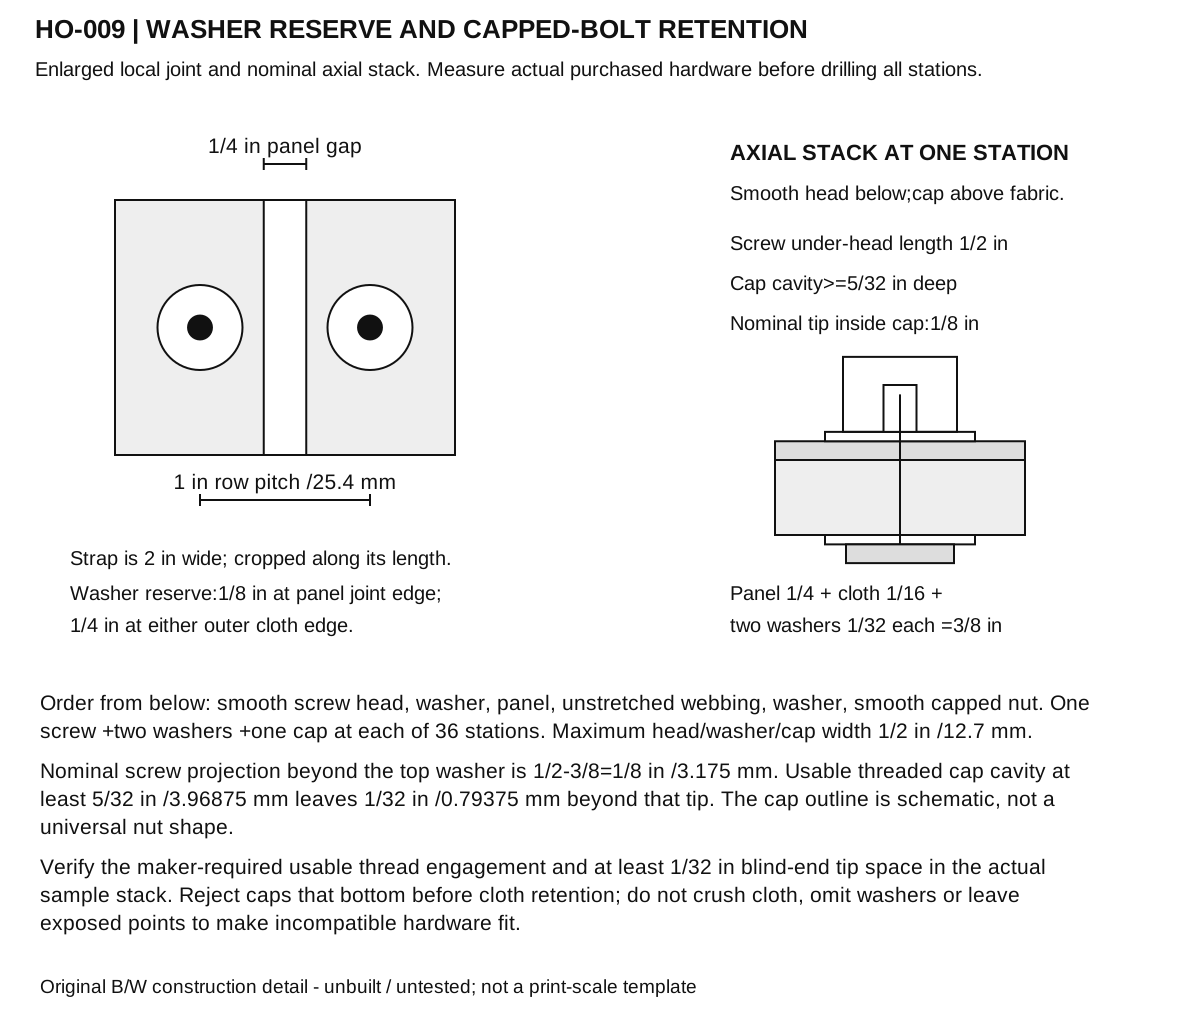
Washer OD 1/2 in maximum gives 1/8 in circle-edge reserve at the panel joint and 1/4 in at the strap outside edge. Along a long row, 3 in pitch leaves 2 1/2 in between maximum washer circles. Across its two rows, 1 in pitch leaves 1/2 in.
Webbing 1/16 in is the nominal illustrated stack, not a universal fabric compression value. Measure the clamped sample; select matching capped nuts with full thread engagement and extra blind-end space. A nominal length label alone is not a fit check.
Purdue University Extension: Wood drying: FNR-37 Source