Workshop · WS-022
Removable window curtain liner
Add a separate washable liner to an existing sound curtain without drilling the window.
Editorial construction draft. Original digital diagrams; no physical build or load certification. Read dimensions, fit and use limits before making changes. US customary dimensions control; metric values are references.
Before marking and cutting
- US inches; feet where appropriate. Metric values are rounded references. Written inch values control.
- 3/4 in means measured 0.750 in actual thickness wherever used. Recalculate mating lengths for other sheet thicknesses; do not substitute nominal stock blindly.
Use limits
- No thermal-resistance, condensation-control or fire-rating claim.
- Do not add to an inadequate or damaged curtain support.
Materials and cuts
| Part | Qty | Size to cut | Material |
|---|---|---|---|
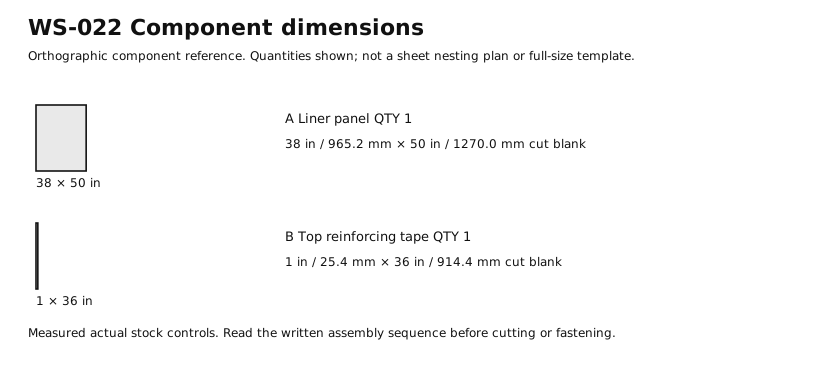
| A Liner panel | 1 | 38 × 50 in 965.2 × 1270 mm | Prewashed opaque cotton; no flame-resistance rating. Cut blank before seams or fitting. |
| B Top reinforcing tape | 1 | 1 × 36 in 25.4 × 914.4 mm | Cotton twill tape. Cut blank before seams or fitting. |
Hardware and consumables
- 5 × Removable curtain clips. Select for actual support; no screws into frame.
- 1 × Thread. Compatible with cotton.
Tools
- Rule with fractional inches
- Pencil or appropriate material marker
- Scissors or cutter suited to the actual material
- Straightedge
- Sacrificial cutting backing
- Sewing needle or suitable sewing machine
- Scissors
- Pins; remove and count after sewing
Assembly
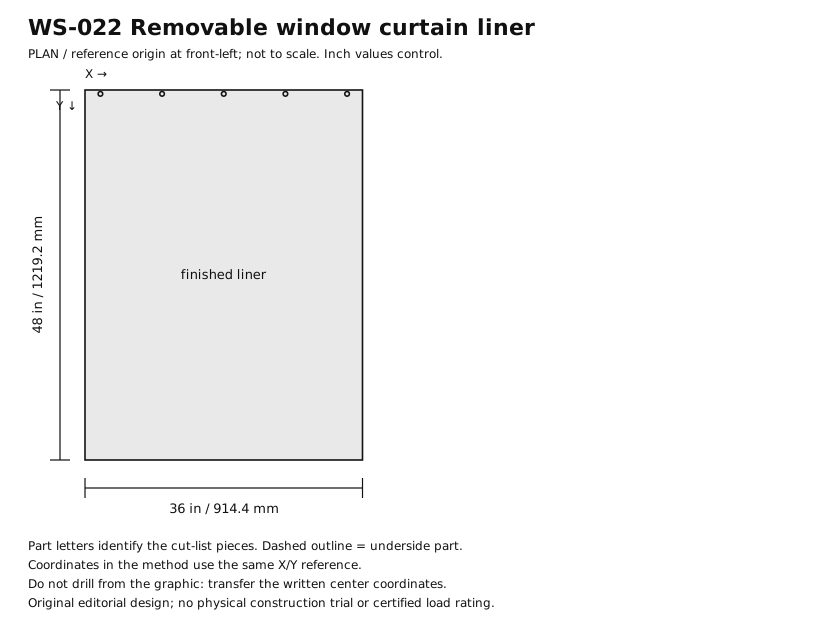
- Measure the existing curtain and confirm its support can accept an added light textile. This example gives a finished liner 36 × 48 in / 3 × 4 ft.
- Keep the panel clear of any heater, cooking surface, window escape opening or required vent; do not treat it as a fire barrier.
- Cut A 38 × 50 in and B 36 × 1 in. Lay the panel grain square so it hangs without twisting.
- Turn each side edge in 1/2 in twice and stitch, reducing 38 in width to 36 in.
- Turn the bottom under 1/2 in twice and stitch. Turn the top under 1/2 in twice and stitch, reducing overall height to 48 in.
- Center B along the rear of the top hem, spanning the finished 36 in width. Stitch both its long edges, keeping the front face smooth.
- Mark five clip centers across B at X = 2,10,18,26,34 in. Use five removable curtain clips rated by their maker for the existing support and fabric.
- Clip the liner behind the curtain without puncturing the window frame. The liner must not catch a latch or touch damp glazing.
- Open and close the existing curtain and window through their full required movement. Remove the liner if condensation persists against it.
- Record the final dimensions and wash care on an attached fabric label; remove it seasonally to inspect the window for dampness.
Checks
- Finished panel 36 × 48 in with five evenly described clip positions.
- Required window opening and latches remain fully usable.
- No contact with a heater, flame or damp glazing during the trial.
Cleaning and maintenance
- Wash and dry by material instructions.
- Inspect clips, curtain support and window moisture regularly.
Primary context
These sources inform the context and do not endorse the original construction design.