Workshop · WS-046
Ventilated loose-produce inspection crate
Separate a small quantity of dry sound produce in removable appropriate liners for frequent inspection.
Editorial construction draft. Original digital diagrams; no physical build or load certification. Read dimensions, fit and use limits before making changes. US customary dimensions control; metric values are references.
Before marking and cutting
- US inches; feet where appropriate. Metric values are rounded references. Written inch values control.
- 3/4 in means measured 0.750 in actual thickness wherever used. Recalculate mating lengths for other sheet thicknesses; do not substitute nominal stock blindly.
Use limits
- Indoor light-duty organizer only; not a seat, step, lifting crate or structural shelf.
- No certified load or food shelf-life claim. For this open inspection crate, use removable breathable liners suitable for direct contact with the chosen whole, sound produce; keep produce from touching plywood and leave vents open. Follow produce-specific temperature, humidity and storage guidance. This is not sealed food storage.
Materials and cuts
| Part | Qty | Size to cut | Material |
|---|---|---|---|
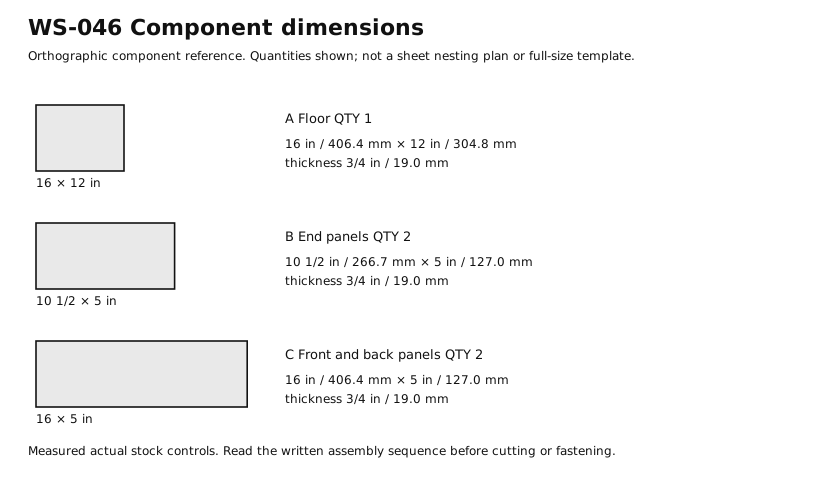
| A Floor | 1 | 16 × 12 × 3/4 in 406.4 × 304.8 × 19.05 mm | Sanded birch plywood with sound, void-free receiving edges. Measured actual thickness 3/4 in. |
| B End panels | 2 | 10 1/2 × 5 × 3/4 in 266.7 × 127 × 19.05 mm | Sanded birch plywood with sound, void-free receiving edges. Measured actual thickness 3/4 in. |
| C Front and back panels | 2 | 16 × 5 × 3/4 in 406.4 × 127 × 19.05 mm | Sanded birch plywood with sound, void-free receiving edges. Measured actual thickness 3/4 in. |
Hardware and consumables
- 14 × #8 × 1 1/4 in wood screws. 10 floor and 4 corner screws; 14 total, with no divider in this project. Suitable for the actual plywood. No glue required.
Tools
- Rule with fractional inches
- Pencil or appropriate material marker
- Reliable square
- Saw suited to the specified stock
- Clamps
- Abrasive and dust-removal brush
- Drill with the specified bit and depth stop where needed
- Driver matching selected fasteners
Assembly
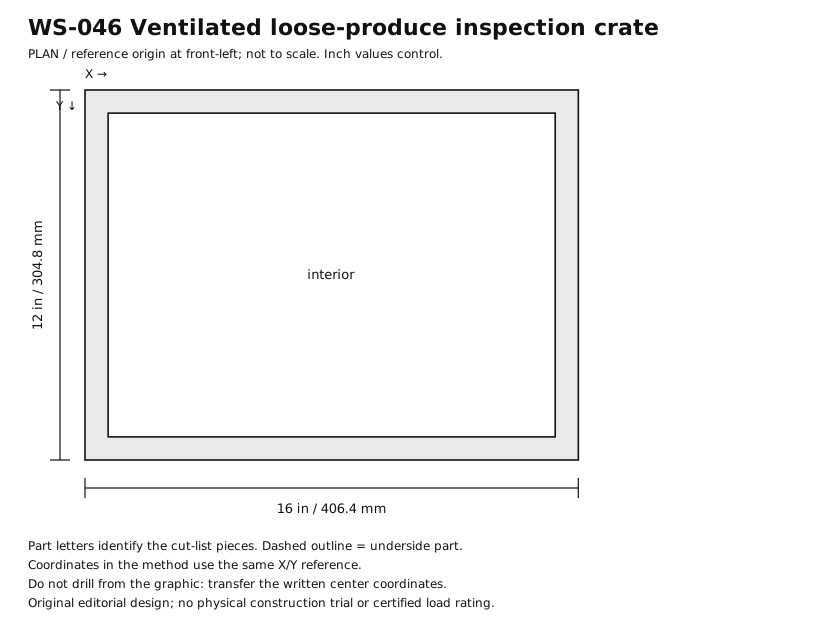
- Define the work. Use only as a small tabletop inspection organizer. Select food-appropriate removable liners and a storage environment suited to the produce; the crate establishes no shelf life. Mark an outside footprint of 16 × 12 in; the finished rim stands 5 3/4 in above its underside.
- Check sheet thickness at several edges. This cut list uses 3/4 in / 19.0 mm actual plywood. The two B pieces fit between the C pieces; their length is 12 minus twice 3/4 = 10 1/2 in.
- Cut A to 16 × 12 in, two B pieces to 10 1/2 × 5 in and two C pieces to 16 × 5 in. Cut on the waste side of each mark and label the inside faces.
- Before fastening the side panels, mark three 1 in-diameter ventilation holes on each C panel at local X = 4,8,12 in, Z = 2 1/2 in. Drill over backing, clamp and ease each hole.
- Mark two 1 in holes on each B panel at local length = 3 and 7 1/2 in, height 2 1/2 in. Drill before assembly; these holes are not lifting handles.
- Dry-fit A on a flat bench. Stand C on its front and back edges, then B between them at each end. The outside faces finish flush with A. Clamp the rectangle and compare its diagonals before fastening.
- Mark floor screw centerlines 3/8 in in from each outside edge. On each C line use X = 1 1/2, 8, and 14 1/2 in; on each B line use Y = 1 1/2 and 10 1/2 in. Avoid overlapping corner holes.
- Select corrosion-resistant #8 × 1 1/4 in countersunk wood screws suitable for plywood. Prove clearance-hole, edge-pilot and countersink settings on an offcut; use a depth stop. Clamp each upright while drilling rather than pulling it upright with a screw.
- Drive ten screws from underneath A into the centered upright edges at the marked locations. Work in opposed pairs and keep heads flush. Stop and replace a split or delaminated part; do not cover it with a patch.
- At each corner, drill through C into the end of B at 2 1/2 in above A. Fit one screw per corner, positioned 3/8 in from the side edge. These four screws hold the light organizer square; they do not establish a load rating.
- Ease accessible corners and remove dust. Place the empty unit on its actual level surface; check that all four corners bear and that no fastener point or burr can contact hands or stored articles.
- After assembly place suitable removable liners inside without blocking all holes. Inspect produce individually and remove damaged items promptly; empty before moving the crate.
Checks
- Outside footprint 16 × 12 in; overall height 5 3/4 in.
- Clear interior 14 1/2 × 10 1/2 in; no divider is fitted.
- Opposing floor diagonals differ by no more than 1/8 in in this workshop example.
- All heads flush; no split receiving edges, projecting tips, loose parts or rocking.
- All ten vent holes are smooth and open; the empty crate is moved only with support underneath.
Cleaning and maintenance
- Empty and brush or wipe clean as appropriate for the material.
- Dry fully after damp wiping; inspect joints and the support surface before reloading.
- Replace swollen plywood, cracked parts or loose fasteners.
Primary context
These sources inform the context and do not endorse the original construction design.