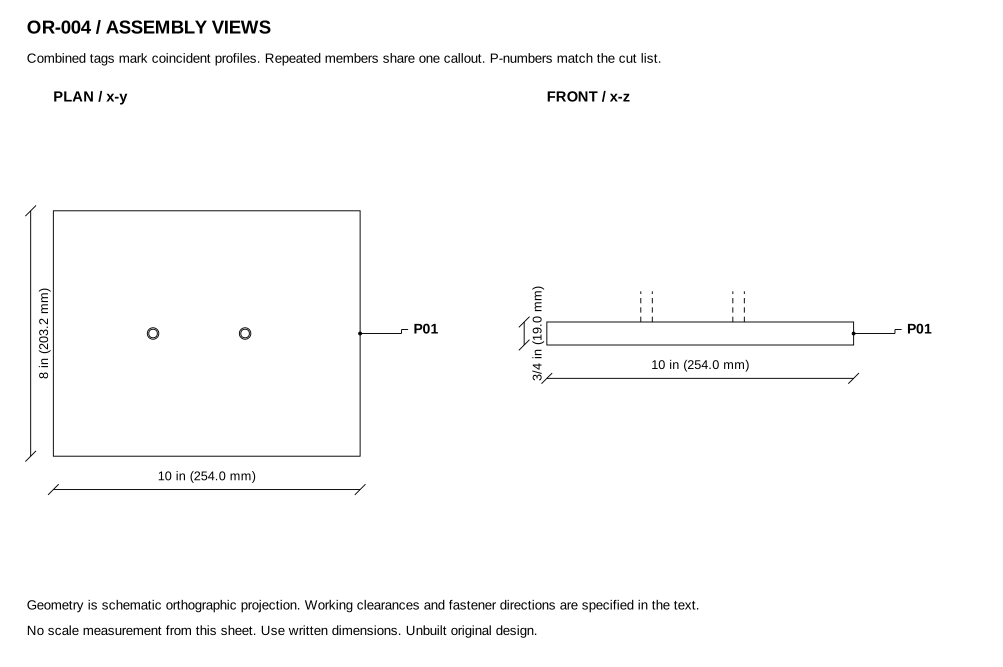
OR-004 / Bend a repeatable smooth U-shaped ground-layer pin around two small mandrels, keeping bend radius and leg spacing controlled instead of making sharp hand-plier corners.
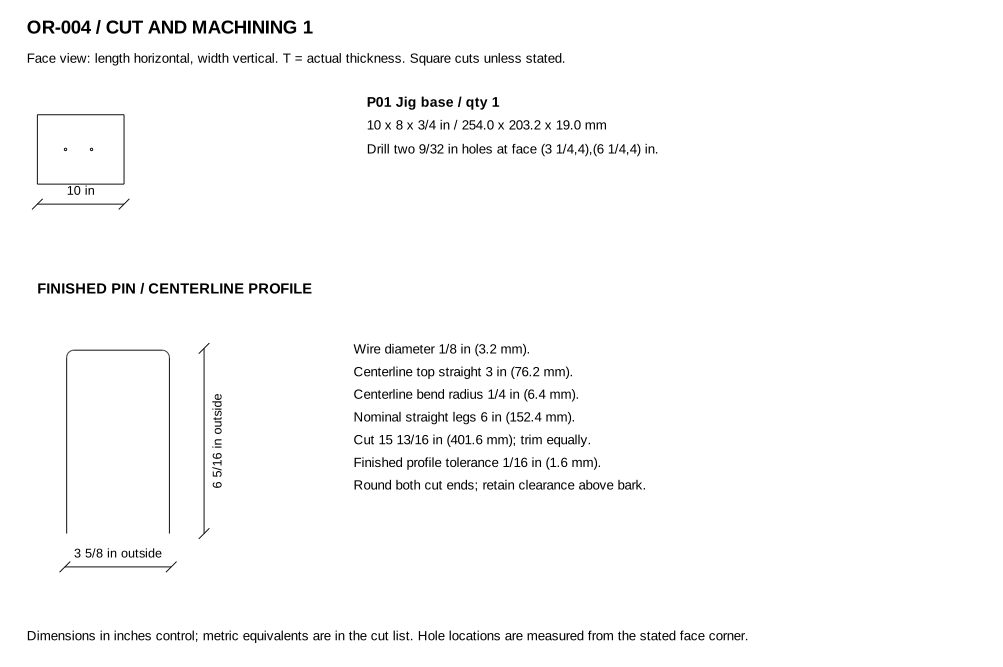
One pin per cycle from annealed 1/8 in stainless wire. Target centerline straight top span 3 in, bend centerline radius 1/4 in, straight legs 6 in. Approximate outside width 3 5/8 in and height 6 5/16 in; finished tolerance 1/16 in.
Pins hold a suitable low branch near soil; they must not clamp bark. Select the crop and layering procedure separately.
No fence, anchor or lifting capacity. Do not bend spring-tempered wire, galvanized fence wire of unknown temper or wire with sharp burrs.
Two purchased steel spacers: 1 in long, 3/8 in OD, 1/4 in bore, smooth outside
Two 1/4-20 x 2 1/2 in bolts, four washers and two locknuts
Annealed 1/8 in stainless wire, cut 15 13/16 in per pin; one pin is an output of this jig, not another counted project
Two bench clamps; two end caps or rounded covers for exposed bolt threads
Tape measure and combination square
Pencil, clamps and safety glasses
Saw with wood blade; drill/driver and piloting bits
120- and 180-grit abrasive
Wire cutters rated for the selected stainless wire
Two smooth-jaw bending pliers and a fine file
9/32 in drill bit
Mandrel bolts pass through 3/4 in base plus 1 in spacers; washers and locknuts complete the stack. The wire is bent around smooth spacers, not bare threads.
| Part / quantity | Actual L x W x T | Material / stock |
|---|---|---|
| P01 Jig base / 1 | 10 x 8 x 3/4 in / 254.0 x 203.2 x 19.0 mm | Exterior plywood, measured actual thickness as listed; seal cut edges outside plant-contact surfaces; Actual 8 x 3/4 in / 203.2 x 19.0 mm section; cut length below |
Mandrel centers are 3 in apart; both are vertical and cannot rotate loose under hand bending.
Pin legs are parallel, ends smooth and not pointed toward exposed footpaths.
Installed pin retains clearance over the branch and does not pinch it as the soil settles.
Push by hand into prepared loose soil; do not hammer the pin or use it to pull a branch downward forcibly. Mark its location to avoid stepping on it.
Remove after rooting or when no longer required, wash soil off and inspect for kinks or sharp corrosion. Retighten jig hardware as needed.
Not performed; no load rating, animal acceptance, yield or durability performance is claimed.
How to Propagate Shrubs by Layering - Simple/tip and mound-layering context. No hormone, fertilizer or universal rooting schedule supplied.