Workshop · WS-007
Reversible knot-practice post board
Practice identification and untying of simple household knots on fixed wooden posts.
Editorial construction draft. Original digital diagrams; no physical build or load certification. Read dimensions, fit and use limits before making changes. US customary dimensions control; metric values are references.
Before marking and cutting
- US inches; feet where appropriate. Metric values are rounded references. Written inch values control.
- 3/4 in means measured 0.750 in actual thickness wherever used. Recalculate mating lengths for other sheet thicknesses; do not substitute nominal stock blindly.
Use limits
- A tabletop light-article fixture; not a pegboard climbing aid, handle, lever or wall anchor.
- No rated load or suitability for an unsupported tool blade is claimed.
Materials and cuts
| Part | Qty | Size to cut | Material |
|---|---|---|---|
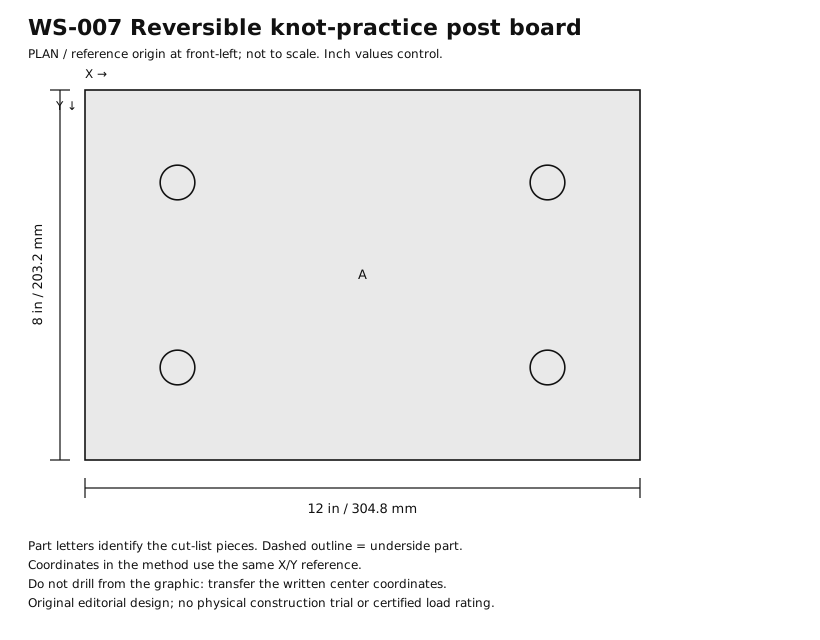
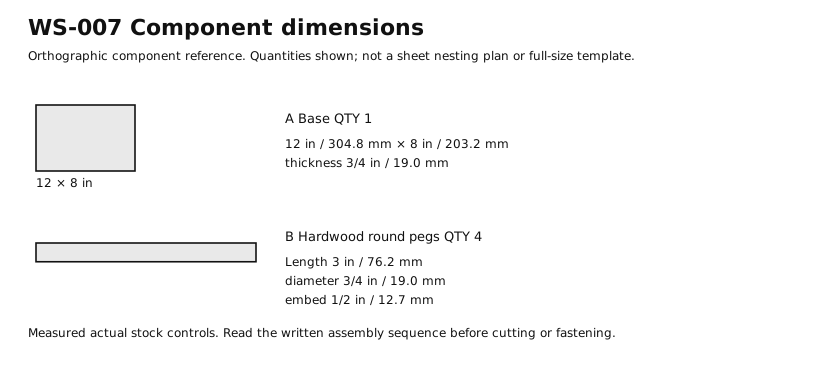
| A Base | 1 | 12 × 8 × 3/4 in 304.8 × 203.2 × 19.05 mm | Sanded birch plywood with sound, void-free receiving edges. Measured actual thickness 3/4 in. |
| B Hardwood round pegs | 4 | 3 × 3/4 in 76.2 × 19.05 mm | Smooth solid hard maple dowel, untreated; measured diameter controls socket fit.. Round stock: length × diameter. Embed 1/2 in. |
Hardware and consumables
- 1 × Wood adhesive. Use labeled dry-wood adhesive and its full cure time.
Tools
- Rule with fractional inches
- Pencil or appropriate material marker
- Reliable square
- Saw suited to the specified stock
- Clamps
- Abrasive and dust-removal brush
- Drill with the specified bit and depth stop where needed
- Driver matching selected fasteners
Assembly
- Use short soft practice cord only, in pieces 24 in long. This board teaches hand motions and is not a test rig or a way to qualify a knot for life safety.
- Cut A to 12 in / 304.8 mm by 8 in / 203.2 mm, using measured 3/4 in stock. Mark the front-left corner as X0 Y0 and carry that reference through the work.
- Crosscut 4 pegs B to 3 in / 76.2 mm each. Dress end grain and round the top edges; preserve at least 2 1/2 in usable exposed length.
- Lay out peg centers on A: X 2, Y 2 in; X 10, Y 2 in; X 2, Y 6 in; X 10, Y 6 in. These are centers, not clear gaps.
- Test the actual dowel and a 3/4 in nominal bit in an offcut. Select a fit that seats without splitting; do not force an oversized dowel into a nominal hole.
- Set a positive drilling stop at 1/2 in / 12.7 mm. Drill perpendicular blind sockets, leaving 1/4 in / 6.3 mm of A beneath each socket. Clamp the board and use backing under the work.
- Clean each socket. Apply a small amount of wood adhesive appropriate to the dry indoor use on the embedded 1/2 in of B; keep adhesive out of the exposed gripping area.
- Seat every peg to the marked 1/2 in insertion line. Check perpendicularity with a square from two directions and remove squeeze-out before it cures.
- Let the adhesive cure for its full labeled time. Do not load or twist the pegs while curing; no screw or nail is driven into a peg end.
- Before tying, draw the intended cord path on paper and check the chosen crossings and tail locations against a separate reliable knot instruction. Keep the drawing for comparison after tying; the board itself does not define a safe knot.
- After full cure, place a 24 in cord around two posts and tie the chosen household knot; keep the board flat on the bench while practicing. Compare the actual cord path with the prepared drawing without applying a load.
- Untie without a blade, then coil the short cord and remove it before storage. Do not leave loops accessible to children or animals.
Checks
- Each socket is 1/2 in deep and each peg projects 2 1/2 in above A.
- Pegs remain upright and cannot be turned out by normal hand use after full adhesive cure.
- Posts project 2 1/2 in, and their center rectangle is 8 × 4 in; a cord can pass between them without rubbing a splintered edge.
- Base rests flat without projecting points or sharp edges.
Cleaning and maintenance
- Remove articles and brush dust from socket joints.
- Do not immerse the glued assembly. Dry immediately if damp.
- Replace any split peg or loose socket before reuse.
Primary context
These sources inform the context and do not endorse the original construction design.