Workshop · WS-019
Felt chisel edge wallet
Separate three protected hand chisels so their cutting edges do not rub in a toolbox.
Editorial construction draft. Original digital diagrams; no physical build or load certification. Read dimensions, fit and use limits before making changes. US customary dimensions control; metric values are references.
Before marking and cutting
- US inches; feet where appropriate. Metric values are rounded references. Written inch values control.
- 3/4 in means measured 0.750 in actual thickness wherever used. Recalculate mating lengths for other sheet thicknesses; do not substitute nominal stock blindly.
Use limits
- No cut-resistance, impact protection or travel-case certification.
Materials and cuts
| Part | Qty | Size to cut | Material |
|---|---|---|---|
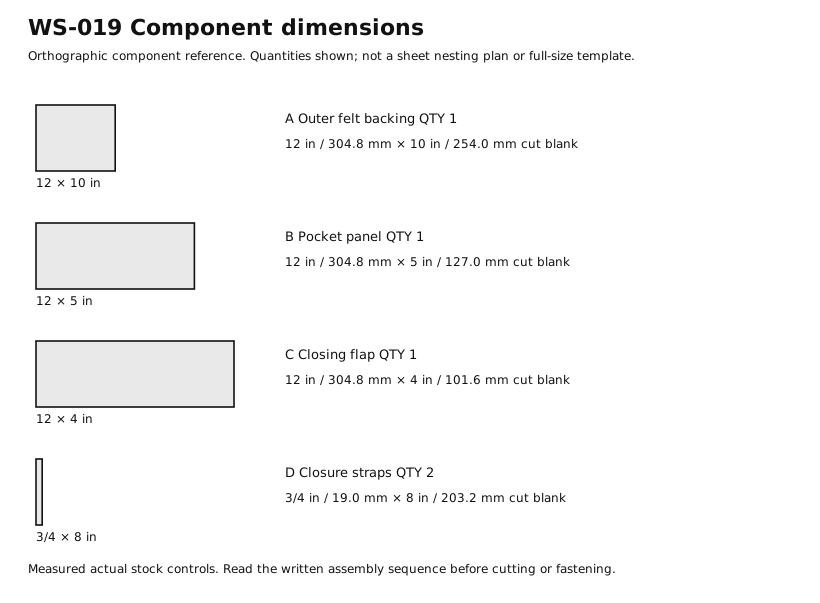
| A Outer felt backing | 1 | 12 × 10 in 304.8 × 254 mm | Dense 1/8 in synthetic felt; not certified cut-resistant. Cut blank before seams or fitting. |
| B Pocket panel | 1 | 12 × 5 in 304.8 × 127 mm | Same dense felt. Cut blank before seams or fitting. |
| C Closing flap | 1 | 12 × 4 in 304.8 × 101.6 mm | Same dense felt. Cut blank before seams or fitting. |
| D Closure straps | 2 | 3/4 × 8 in 19.05 × 203.2 mm | Reusable hook-and-loop straps. Cut blank before seams or fitting. |
Hardware and consumables
- 1 × Strong thread. Hand or machine stitch suited to felt.
Tools
- Rule with fractional inches
- Pencil or appropriate material marker
- Scissors or cutter suited to the actual material
- Straightedge
- Sacrificial cutting backing
- Sewing needle or suitable sewing machine
- Scissors
- Pins; remove and count after sewing
Assembly
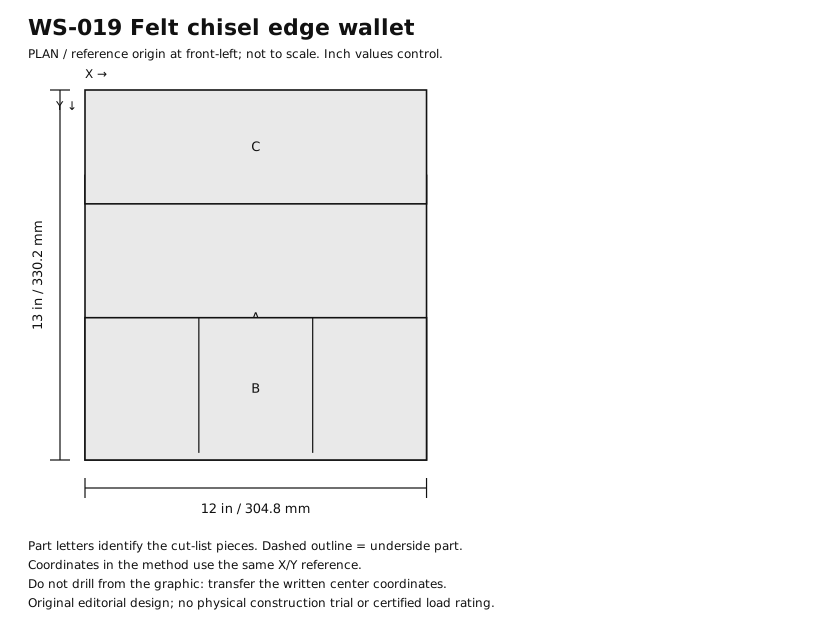
- Keep manufacturer edge caps fitted on all chisels. This felt wallet separates capped tools; felt alone is not an edge guard.
- Cut A 12 × 10, B 12 × 5 and C 12 × 4 in from measured 1/8 in dense felt.
- Lay A flat with X along 12 in and bottom at Y = 10 in. Place B on A at Y = 5–10 in, matching side and bottom edges.
- Sew B to A along X = 1/4, X = 11 3/4 and Y = 9 3/4 in with strong thread, leaving its top open.
- Mark two divider seams X = 4 and 8 in from Y = 5 to 9 3/4 in. Sew each twice, keeping the lines straight.
- Overlap C behind A’s top by 1 in; C then extends 3 in above A. Sew two horizontal rows through the overlap at Y = 1/4 and 3/4 in.
- Reinforce pocket upper corners with 1/2 in-long extra stitch rows. Account for every needle and pin.
- Insert one capped chisel per pocket with its protected cutting end down. Reject a chisel that protrudes beyond the flap’s cover or strains a seam.
- Fold C over the handles, roll loosely from one side and retain with the two 8 in hook-and-loop straps; do not press on a cutting edge.
- Unroll on a bench, confirm each edge cap remains in place and label the wallet CAPPED TOOLS ONLY.
Checks
- Three pockets each nominally 4 in wide before seam allowance.
- Every cutting edge retains its separate rigid cap.
- Flap covers handles and roll closes without straining stitches.
Cleaning and maintenance
- Empty and brush dry.
- Replace pierced felt, torn seams or lost edge caps before reuse.
Primary context
These sources inform the context and do not endorse the original construction design.