Garden · GA-002
Contained potting work tray
Keep potting mix inside a shallow bench tray while returning spilled media to its container.
Editorial construction draft. Original digital diagrams; no physical build or load certification. Read dimensions, fit and use limits before making changes. US customary dimensions control; metric values are references.
Before marking and cutting
- Measure the stated stock sections before cutting. Use the cut-list geometry, not scale measurements from the drawing.
- US inch dimensions control; millimeter values are rounded conversions. Ordinary cut target ±1/16 in (1.6 mm); fit commercial accessories before boring attachment holes.
Use limits
- Original bounded garden component, not an occupied structure.
- No human standing, sitting, climbing, lifting or fall protection use. No stated safe working load.
- Geometry and fastener quantities are editorially checked; no prototype build, wind test or crop trial is claimed.
Materials and cuts
| Part | Qty | Size to cut | Material |
|---|---|---|---|
| P01 Base | 1 | 24 × 18 × 1/2 in 609.6 × 457.2 × 12.7 mm | measured 1/2 in plywood exterior-bond plywood for protected non-food-contact fixtures; substitute thickness only by recalculating joints |
| P02 Rear wall | 1 | 24 × 3 1/2 × 3/4 in 609.6 × 88.9 × 19.05 mm | 1 × 4 in board sound untreated cedar or other durable untreated wood |
| P03 Side walls | 2 | 17 1/4 × 3 1/2 × 3/4 in 438.15 × 88.9 × 19.05 mm | 1 × 4 in board sound untreated cedar or other durable untreated wood |
| P04 Front low lip | 1 | 22 1/2 × 1 1/2 × 3/4 in 571.5 × 38.1 × 19.05 mm | 1 × 2 in board sound untreated cedar or other durable untreated wood; no unknown salvage |
Hardware and consumables
- 22 exterior #8 × 1-1/4 in screws: 6 rear, 6 each side, 4 front
- 1 removable 23 × 17 in flexible non-food-contact liner, corners folded upward
Tools
- Tape measure and steel rule
- Pencil, square and clamps
- Saw suited to the stated stock; eye and hearing protection
- Drill/driver, countersink and bits matched to fasteners
- Sandpaper and edge file; gloves when handling cut mesh
Assembly
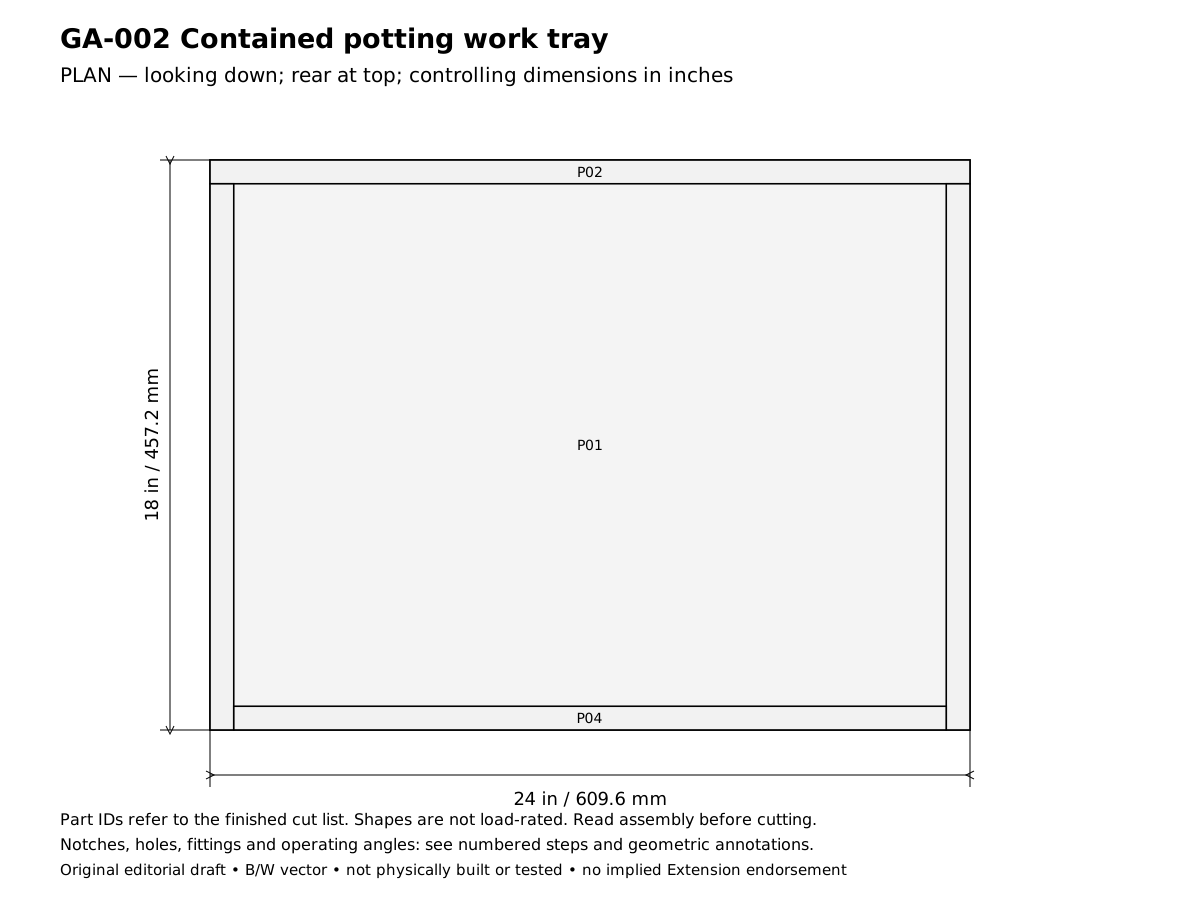
- Plan the contained potting work tray for this result: Keep potting mix inside a shallow bench tray while returning spilled media to its container. Confirm the design reference before cutting: Inside floor is 22-1/2 × 16-1/2 in (571.5 × 419.1 mm). In the drawings x runs left to right, y runs front to rear and z runs upward.
- Verify the required stock before laying out these parts: 1 × 2 in board: actual 0.75 × 1.5 in (19.05 × 38.1 mm); 1 × 4 in board: actual 0.75 × 3.5 in (19.05 × 88.9 mm); measured 1/2 in plywood: measured thickness 0.5 in. Reject split or twisted wood and unknown salvage; thinner stock requires recalculating the joints, not simply using the listed lengths.
- Cut and label the finished parts: 1 Base 24 × 18 × 0.5 in (609.6 × 457.2 × 12.7 mm), mark P01; 1 Rear wall 24 × 3.5 × 0.75 in (609.6 × 88.9 × 19.05 mm), mark P02; 2 Side walls 17.25 × 3.5 × 0.75 in (438.15 × 88.9 × 19.05 mm), mark P03; 1 Front low lip 22.5 × 1.5 × 0.75 in (571.5 × 38.1 × 19.05 mm), mark P04. Keep saw kerf outside each finished line. Rip only where the finished width is narrower than the actual stock; use a suitable guide and target ±1/16 in (1.6 mm) for ordinary cuts. Dowel triples mean length × diameter × diameter, not square dowel stock.
- Set the 24 × 18 in base with its long edge facing the operator. Mark the rear wall at y = 17-1/4 in.
- Clamp the rear wall on top of the base. Drill six underside pilots into its lower edge at x = 1, 5.4, 9.8, 14.2, 18.6 and 23 in; install the rear screws.
- Fit the 17-1/4 in side walls against the rear wall, not behind it. Their front ends must be flush with the front edge of the base.
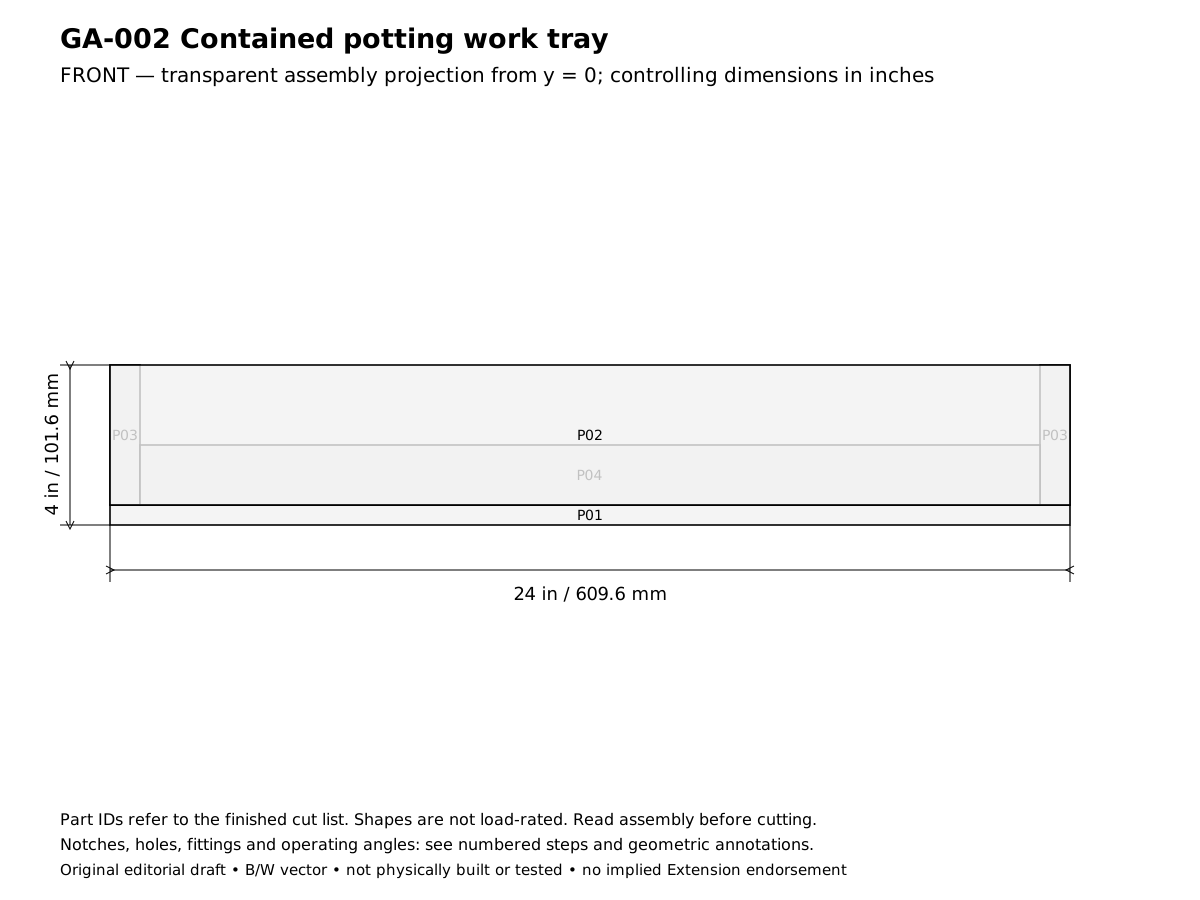
- Fasten each side from beneath with six screws spaced between y = 1 and 16 in. Keep the pilot centered in the 3/4 in wall thickness.
- Fit the 22-1/2 in front lip between the sides. Its lower face rests on the base and its top stands 2 in above the bench.
- Install the four front-lip screws through the base at x = 2, 8.67, 15.33 and 22 in; verify none emerges through the lip face.
- Place the removable liner inside without piercing it. Fold its rear and side margins upward; leave a pull tab at the low front edge.
- Position the tray on a stable bench, move a small pot across the front lip, and sweep the liner toward a separate return pail. Keep fertilizer containers outside the tray.
- Complete the acceptance checks below before putting the assembly into service. Record any changed stock thickness, fastener or equipment fit on the project sheet. The published geometry has not been physically built or load-tested.
Checks
- Inside floor is 22-1/2 × 16-1/2 in (571.5 × 419.1 mm).
- No screw point or splinter contacts the liner.
- Tray sits flat and does not obstruct the bench edge.
Operation
- This is a potting surface, not a produce-washing or food-preparation tray.
Cleaning and maintenance
- Remove the liner to clean and dry the wood; replace a cracked liner.
Primary context
These sources inform the context and do not endorse the original construction design.