Garden · GA-005
Three-inch transplant marking board
Mark a repeatable planting grid on loose prepared soil without standing in the bed.
Editorial construction draft. Original digital diagrams; no physical build or load certification. Read dimensions, fit and use limits before making changes. US customary dimensions control; metric values are references.
Before marking and cutting
- Measure the stated stock sections before cutting. Use the cut-list geometry, not scale measurements from the drawing.
- US inch dimensions control; millimeter values are rounded conversions. Ordinary cut target ±1/16 in (1.6 mm); fit commercial accessories before boring attachment holes.
Use limits
- Original bounded garden component, not an occupied structure.
- No human standing, sitting, climbing, lifting or fall protection use. No stated safe working load.
- Geometry and fastener quantities are editorially checked; no prototype build, wind test or crop trial is claimed.
Materials and cuts
| Part | Qty | Size to cut | Material |
|---|---|---|---|
| P01 Board | 1 | 12 × 12 × 3/4 in 304.8 × 304.8 × 19.05 mm | measured 3/4 in plywood exterior-bond plywood for protected non-food-contact fixtures |
| P02 Dibble dowels | 16 | 1 1/4 × 1/2 × 1/2 in 31.75 × 12.7 × 12.7 mm | 1/2 in dowel smooth hardwood |
| P03 Handle blocks | 2 | 4 × 1 1/2 × 3/4 in 101.6 × 38.1 × 19.05 mm | 1 × 2 in board sound untreated cedar or other durable untreated wood; no unknown salvage |
Hardware and consumables
- 16 hardwood 1/2 in dowels, 1-1/4 in long
- 4 #8 × 1-1/4 in handle screws
- Exterior wood glue for dowels
Tools
- Tape measure and steel rule
- Pencil, square and clamps
- Saw suited to the stated stock; eye and hearing protection
- Drill/driver, countersink and bits matched to fasteners
- Sandpaper and edge file; gloves when handling cut mesh
Assembly
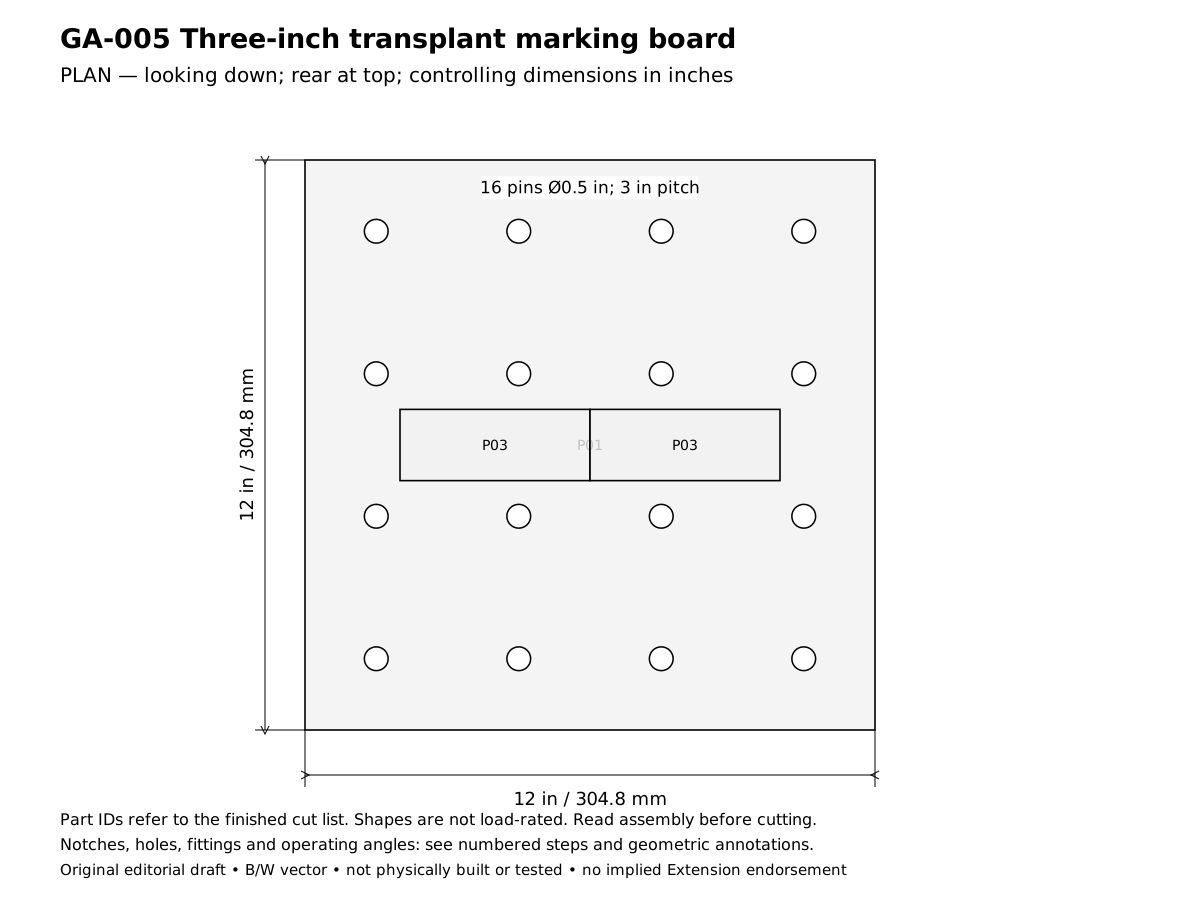
- Plan the three-inch transplant marking board for this result: Mark a repeatable planting grid on loose prepared soil without standing in the bed. Confirm the design reference before cutting: Centers are 3 in (76.2 mm) apart in both directions. In the drawings x runs left to right, y runs front to rear and z runs upward.
- Verify the required stock before laying out these parts: 1 × 2 in board: actual 0.75 × 1.5 in (19.05 × 38.1 mm); 1/2 in dowel: measured diameter 0.5 in; measured 3/4 in plywood: measured thickness 0.75 in. Reject split or twisted wood and unknown salvage; thinner stock requires recalculating the joints, not simply using the listed lengths.
- Cut and label the finished parts: 1 Board 12 × 12 × 0.75 in (304.8 × 304.8 × 19.05 mm), mark P01; 16 Dibble dowels 1.25 × 0.5 × 0.5 in (31.75 × 12.7 × 12.7 mm), mark P02; 2 Handle blocks 4 × 1.5 × 0.75 in (101.6 × 38.1 × 19.05 mm), mark P03. Keep saw kerf outside each finished line. Rip only where the finished width is narrower than the actual stock; use a suitable guide and target ±1/16 in (1.6 mm) for ordinary cuts. Dowel triples mean length × diameter × diameter, not square dowel stock.
- On the lower face mark x and y centerlines at 1-1/2, 4-1/2, 7-1/2 and 10-1/2 in. Intersections form sixteen centers.
- Drill sixteen 1/2 in-diameter blind holes 1/2 in deep using a stop collar. Confirm the stop on scrap; do not break through the 3/4 in panel.
- Round each dowel tip lightly without making a spear point. Mark a 1/2 in insertion line on all sixteen pieces.
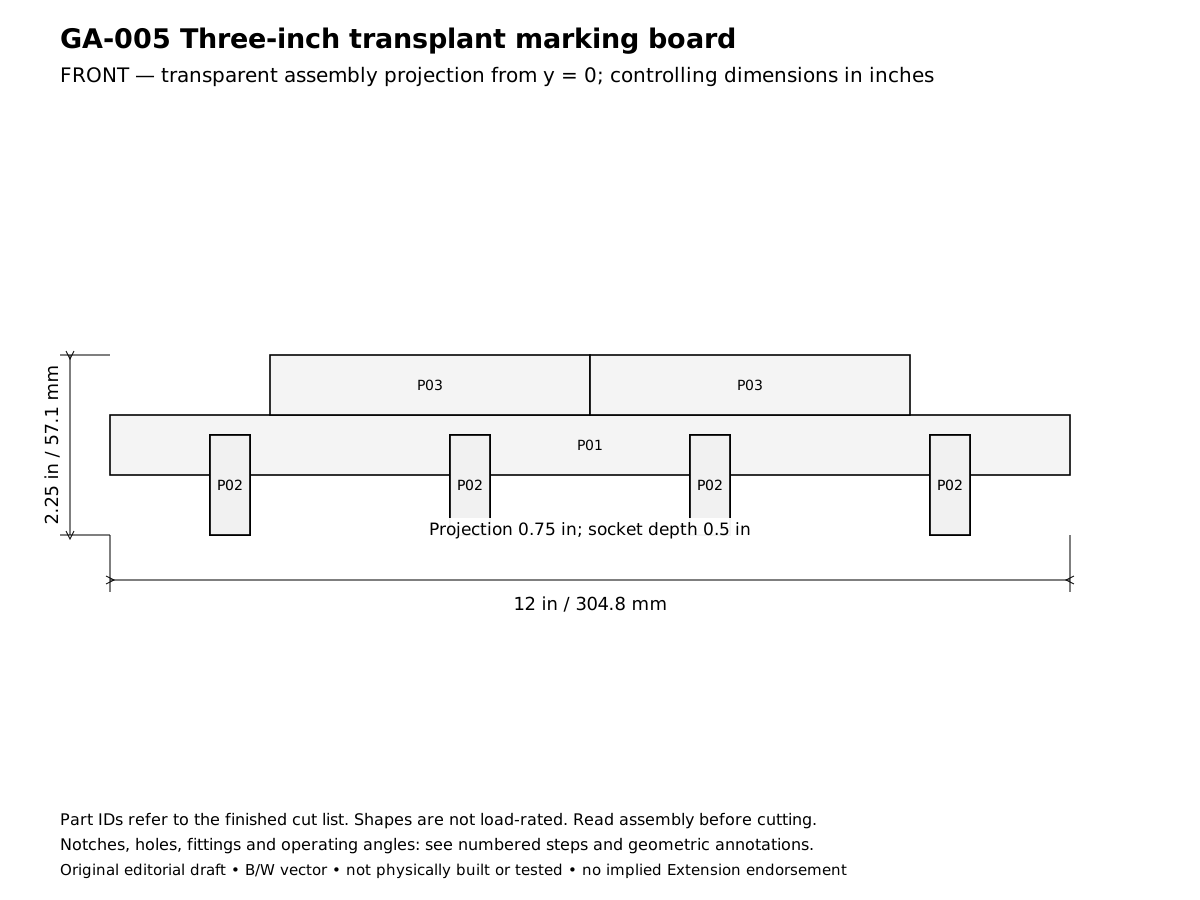
- Glue dowels into the blind holes, checking that each projects 3/4 in below the panel. Remove glue from the surrounding face.
- Join the two 4 in handle blocks end to end on the upper face, centered across x = 2–10 in. They make an 8 in grip, not a full-height carrying handle.
- Predrill and fasten each block with two 1-1/4 in screws from the underside before final dowel installation if driver clearance is limited. Sink heads flush without thinning the plywood excessively.
- After cure, press the board into a shallow tray of loose soil. All sixteen impressions should be visible without rocking or pressing the board with a foot.
- Use the 3 in marks as a layout aid only: select every second or third mark when the crop requires wider spacing. The jig does not set seed depth or crop spacing requirements.
- Complete the acceptance checks below before putting the assembly into service. Record any changed stock thickness, fastener or equipment fit on the project sheet. The published geometry has not been physically built or load-tested.
Checks
- Centers are 3 in (76.2 mm) apart in both directions.
- All projections 3/4 in (19.1 mm) and all dowels tight.
Operation
- Press by hand onto loose soil; never use as footwear or press onto stones.
Cleaning and maintenance
- Brush rather than soak; reglue loose dowels after drying.
Primary context
These sources inform the context and do not endorse the original construction design.