Garden · GA-078
Low potting workbench with open lower bay
Provide a compact braced work surface for the existing potting tray, with an unobstructed bay below for an independently supported materials bucket.
Editorial construction draft. Original digital diagrams; no physical build or load certification. Read dimensions, fit and use limits before making changes. US customary dimensions control; metric values are references.
Before marking and cutting
- Measure the stated stock sections before cutting. Use the cut-list geometry, not scale measurements from the drawing.
- US inch dimensions control; millimeter values are rounded conversions. Ordinary cut target ±1/16 in (1.6 mm); fit commercial accessories before boring attachment holes.
Use limits
- Original bounded garden component, not an occupied structure.
- No human standing, sitting, climbing, lifting or fall protection use. No stated safe working load.
- Geometry and fastener quantities are editorially checked; no prototype build, wind test or crop trial is claimed.
Materials and cuts
| Part | Qty | Size to cut | Material |
|---|---|---|---|
| P01 Legs | 4 | 28 × 3 1/2 × 1 1/2 in 711.2 × 88.9 × 38.1 mm | 2 × 4 in board sound untreated wood |
| P02 Front and rear upper rails | 2 | 36 × 3 1/2 × 1 1/2 in 914.4 × 88.9 × 38.1 mm | 2 × 4 in board sound untreated wood |
| P03 End upper rails | 2 | 20 × 3 1/2 × 1 1/2 in 508 × 88.9 × 38.1 mm | 2 × 4 in board sound untreated wood |
| P04 Worktop | 1 | 39 × 23 × 3/4 in 990.6 × 584.2 × 19.05 mm | measured 3/4 in plywood exterior-bond plywood for protected non-food-contact fixtures |
Hardware and consumables
- 32 #9 × 2-1/2 in screws for upper rails, 4 per rail/leg crossing
- 16 #8 × 1-1/2 in screws for worktop
- 4 metal diagonal braces with product-compatible screws sized to actual wood thickness
- Stable level floor; potting tray/materials are separate, not duplicated project counts
Tools
- Tape measure and steel rule
- Pencil, square and clamps
- Saw suited to the stated stock; eye and hearing protection
- Drill/driver, countersink and bits matched to fasteners
- Sandpaper and edge file; gloves when handling cut mesh
Assembly
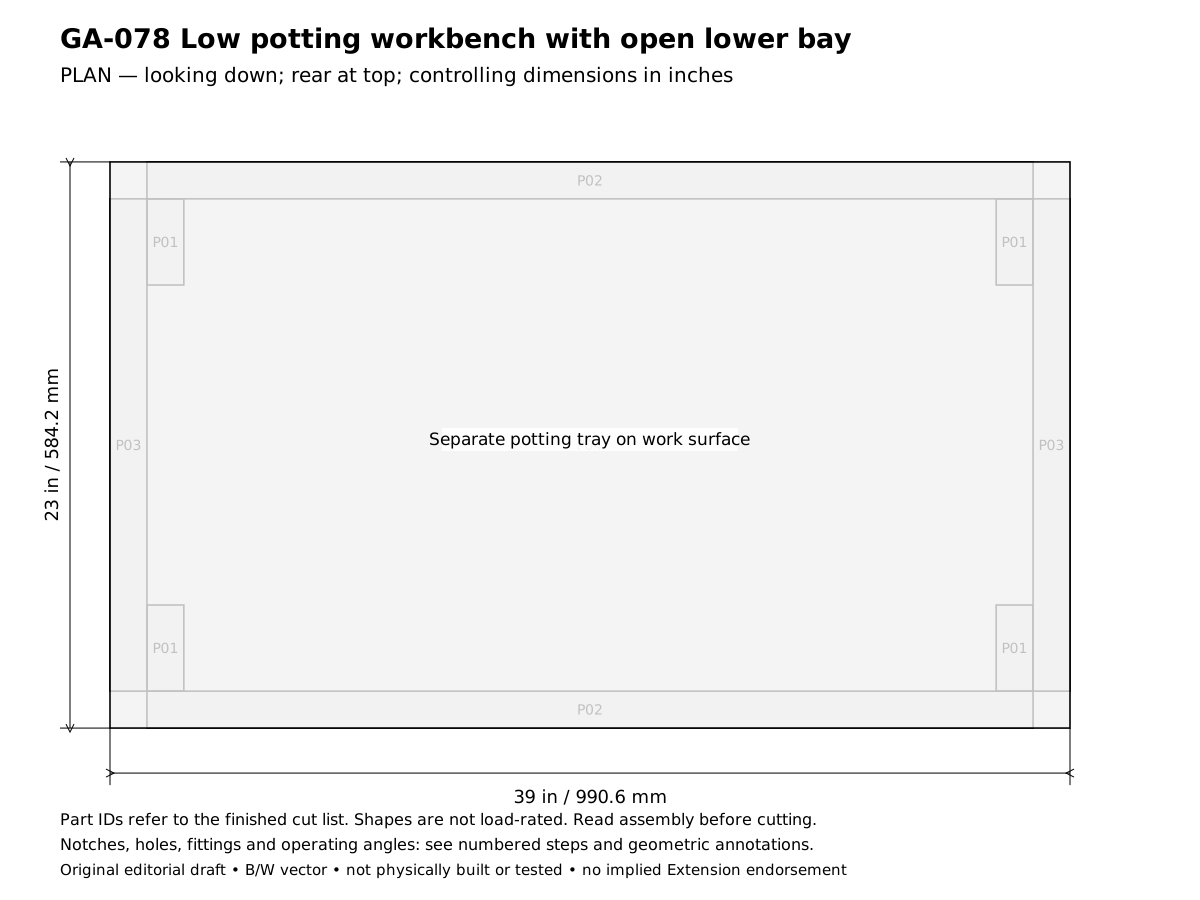
- Plan the low potting workbench with open lower bay for this result: Provide a compact braced work surface for the existing potting tray, with an unobstructed bay below for an independently supported materials bucket. Confirm the design reference before cutting: Worktop 39 × 23 in; height 28-3/4 in (730.3 mm). In the drawings x runs left to right, y runs front to rear and z runs upward.
- Verify the required stock before laying out these parts: 2 × 4 in board: actual 1.5 × 3.5 in (38.1 × 88.9 mm); measured 3/4 in plywood: measured thickness 0.75 in. Reject split or twisted wood and unknown salvage; thinner stock requires recalculating the joints, not simply using the listed lengths.
- Cut and label the finished parts: 4 Legs 28 × 3.5 × 1.5 in (711.2 × 88.9 × 38.1 mm), mark P01; 2 Front and rear upper rails 36 × 3.5 × 1.5 in (914.4 × 88.9 × 38.1 mm), mark P02; 2 End upper rails 20 × 3.5 × 1.5 in (508 × 88.9 × 38.1 mm), mark P03; 1 Worktop 39 × 23 × 0.75 in (990.6 × 584.2 × 19.05 mm), mark P04. Keep saw kerf outside each finished line. Rip only where the finished width is narrower than the actual stock; use a suitable guide and target ±1/16 in (1.6 mm) for ordinary cuts. Dowel triples mean length × diameter × diameter, not square dowel stock.
- Set the four legs at 36 × 20 in outside envelope, with their 3-1/2 in faces running front to rear. Clamp temporary spacing guides.
- Attach front/rear rails outside the legs, top edges flush at 28 in. Use four staggered 2-1/2 in screws per rail/leg crossing.
- Attach end rails outside the leg side faces, also top-flush. Stagger their screws away from the front/rear screw paths.
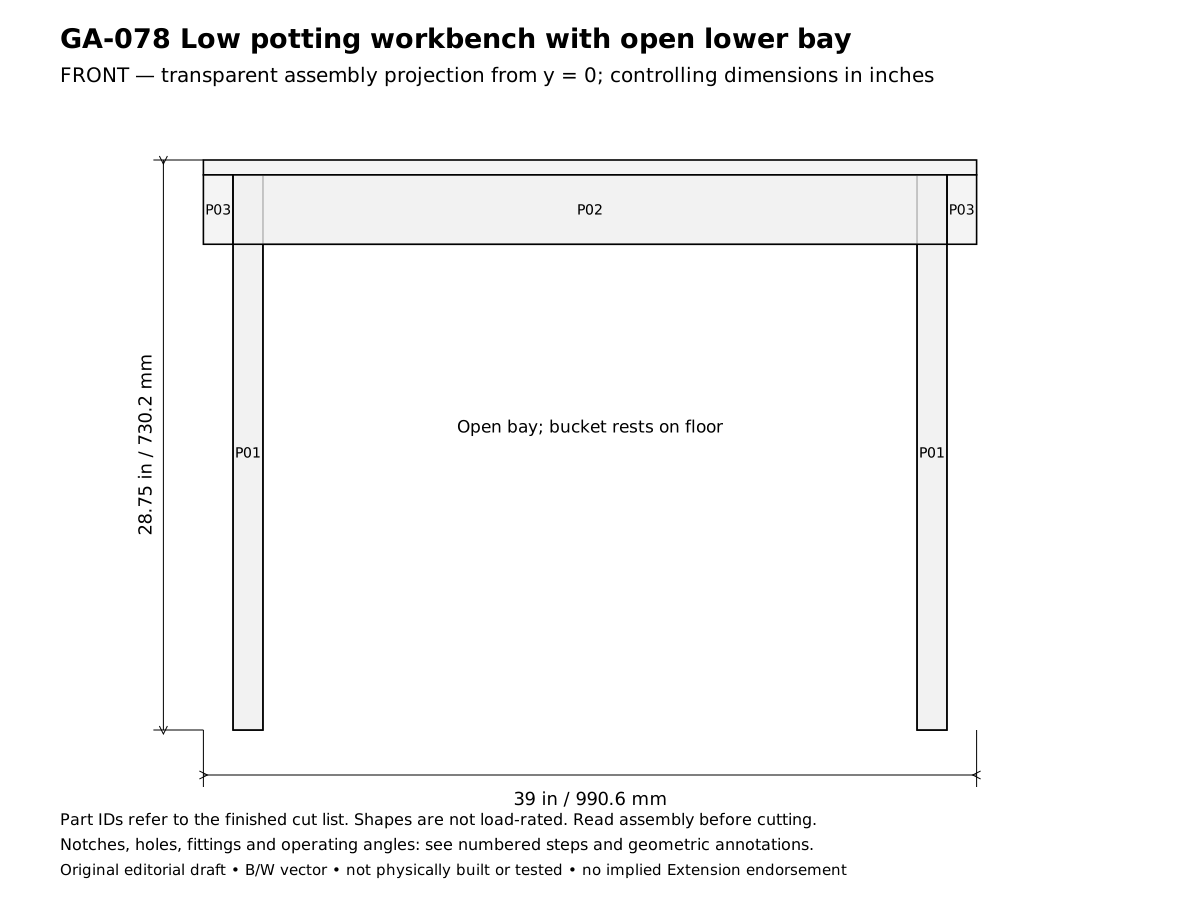
- Square the frame on a flat floor and fit one compatible diagonal brace near each upper corner. Follow its real hole pattern; short screws must remain buried.
- Set the 39 × 23 in worktop over the frame, flush with the outer rail perimeter. Predrill sixteen perimeter holes clear of frame screws.
- Fasten the top with sixteen 1-1/2 in screws into rails, heads flush. Round the top edges and vacuum dust before placing a separate potting tray.
- Check the 28-3/4 in work height against the actual gardener’s reach. Use the lower bay only for containers standing on the floor; do not hang a filled bucket from the rails.
- Trial the empty bench for rocking and racking, then use modest hand potting loads. Stop if a joint moves. No seated, standing, climbing, vise, machinery or numerical working-load rating is implied.
- Complete the acceptance checks below before putting the assembly into service. Record any changed stock thickness, fastener or equipment fit on the project sheet. The published geometry has not been physically built or load-tested.
Checks
- Worktop 39 × 23 in; height 28-3/4 in (730.3 mm).
- Four feet contact floor and four diagonal braces restrain racking.
Operation
- A compact garden work surface, not an engineered heavy workbench or person-supporting platform.
Cleaning and maintenance
- Brush dry after potting, inspect braces and store under cover.
Primary context
These sources inform the context and do not endorse the original construction design.